Anyhow, I tore the recoil system down and this is the culprit I found:

The spring had snapped a few centimeters from where the hook attaches to the rope housing.
Here is what the rope housing looks like on this engine

Now, the big question remained.. To replace or to fix? Since parts for this engine haven't been available over the desk for the last maybe thirty years (at least not in my part of the world!) I decided to give fixing it a shot.
I started by bending the spring end into an approximately similar shape as the part that had broken off.

I had to shave off a couple of millimeters with my hack saw to straighten the end of the spring.
Next, I tried to drill a new hole a few millimeters from the end of the spring but since the spring is made of hardened steel I had nowhere near the success I had hoped for.
I tried to heat it up with a blow torch to soften the steel and then drill it, and this did the trick just perfectly. After drilling the hole, dip the end of the spring in cold water to re-harden the steel.

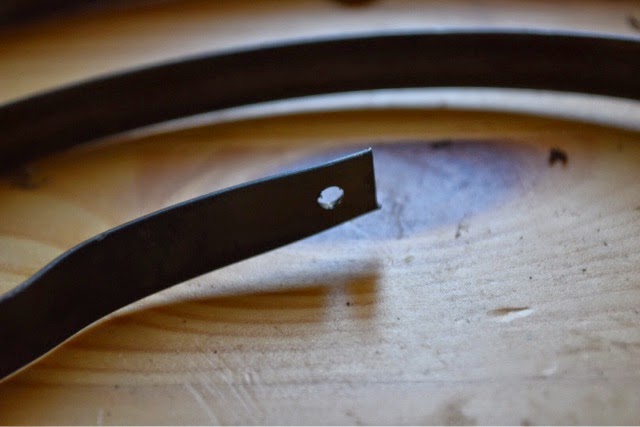
Afterwards, it should look something like this
Next, I removed what was left of the original pop rivet and freed the hook.
Stick a new pop rivet through the drilled holes, and pop it in place.


When it is done, it looks like this

If it is twisted like mine in the pictures, one can simply straighten it with a pair of pliers or with a vice.
Done!
Last but not least comes the most annoying thing when it comes to engine restoration: winding the pull start recoil spring. One quickly burns through ones entire cuss word vocabulary, and it is amazing how creative one gets regarding new words..
Anyway, when it's done it should look like this

Now comes the easy part. Putting everything back together and installing a new pull rope if it is necessary, as it is in my case. Another post comes later on how to do that!
No comments:
Post a Comment